WooCommerce Connector
This guide explains how to integrate a WooCommerce store with Carriyo.
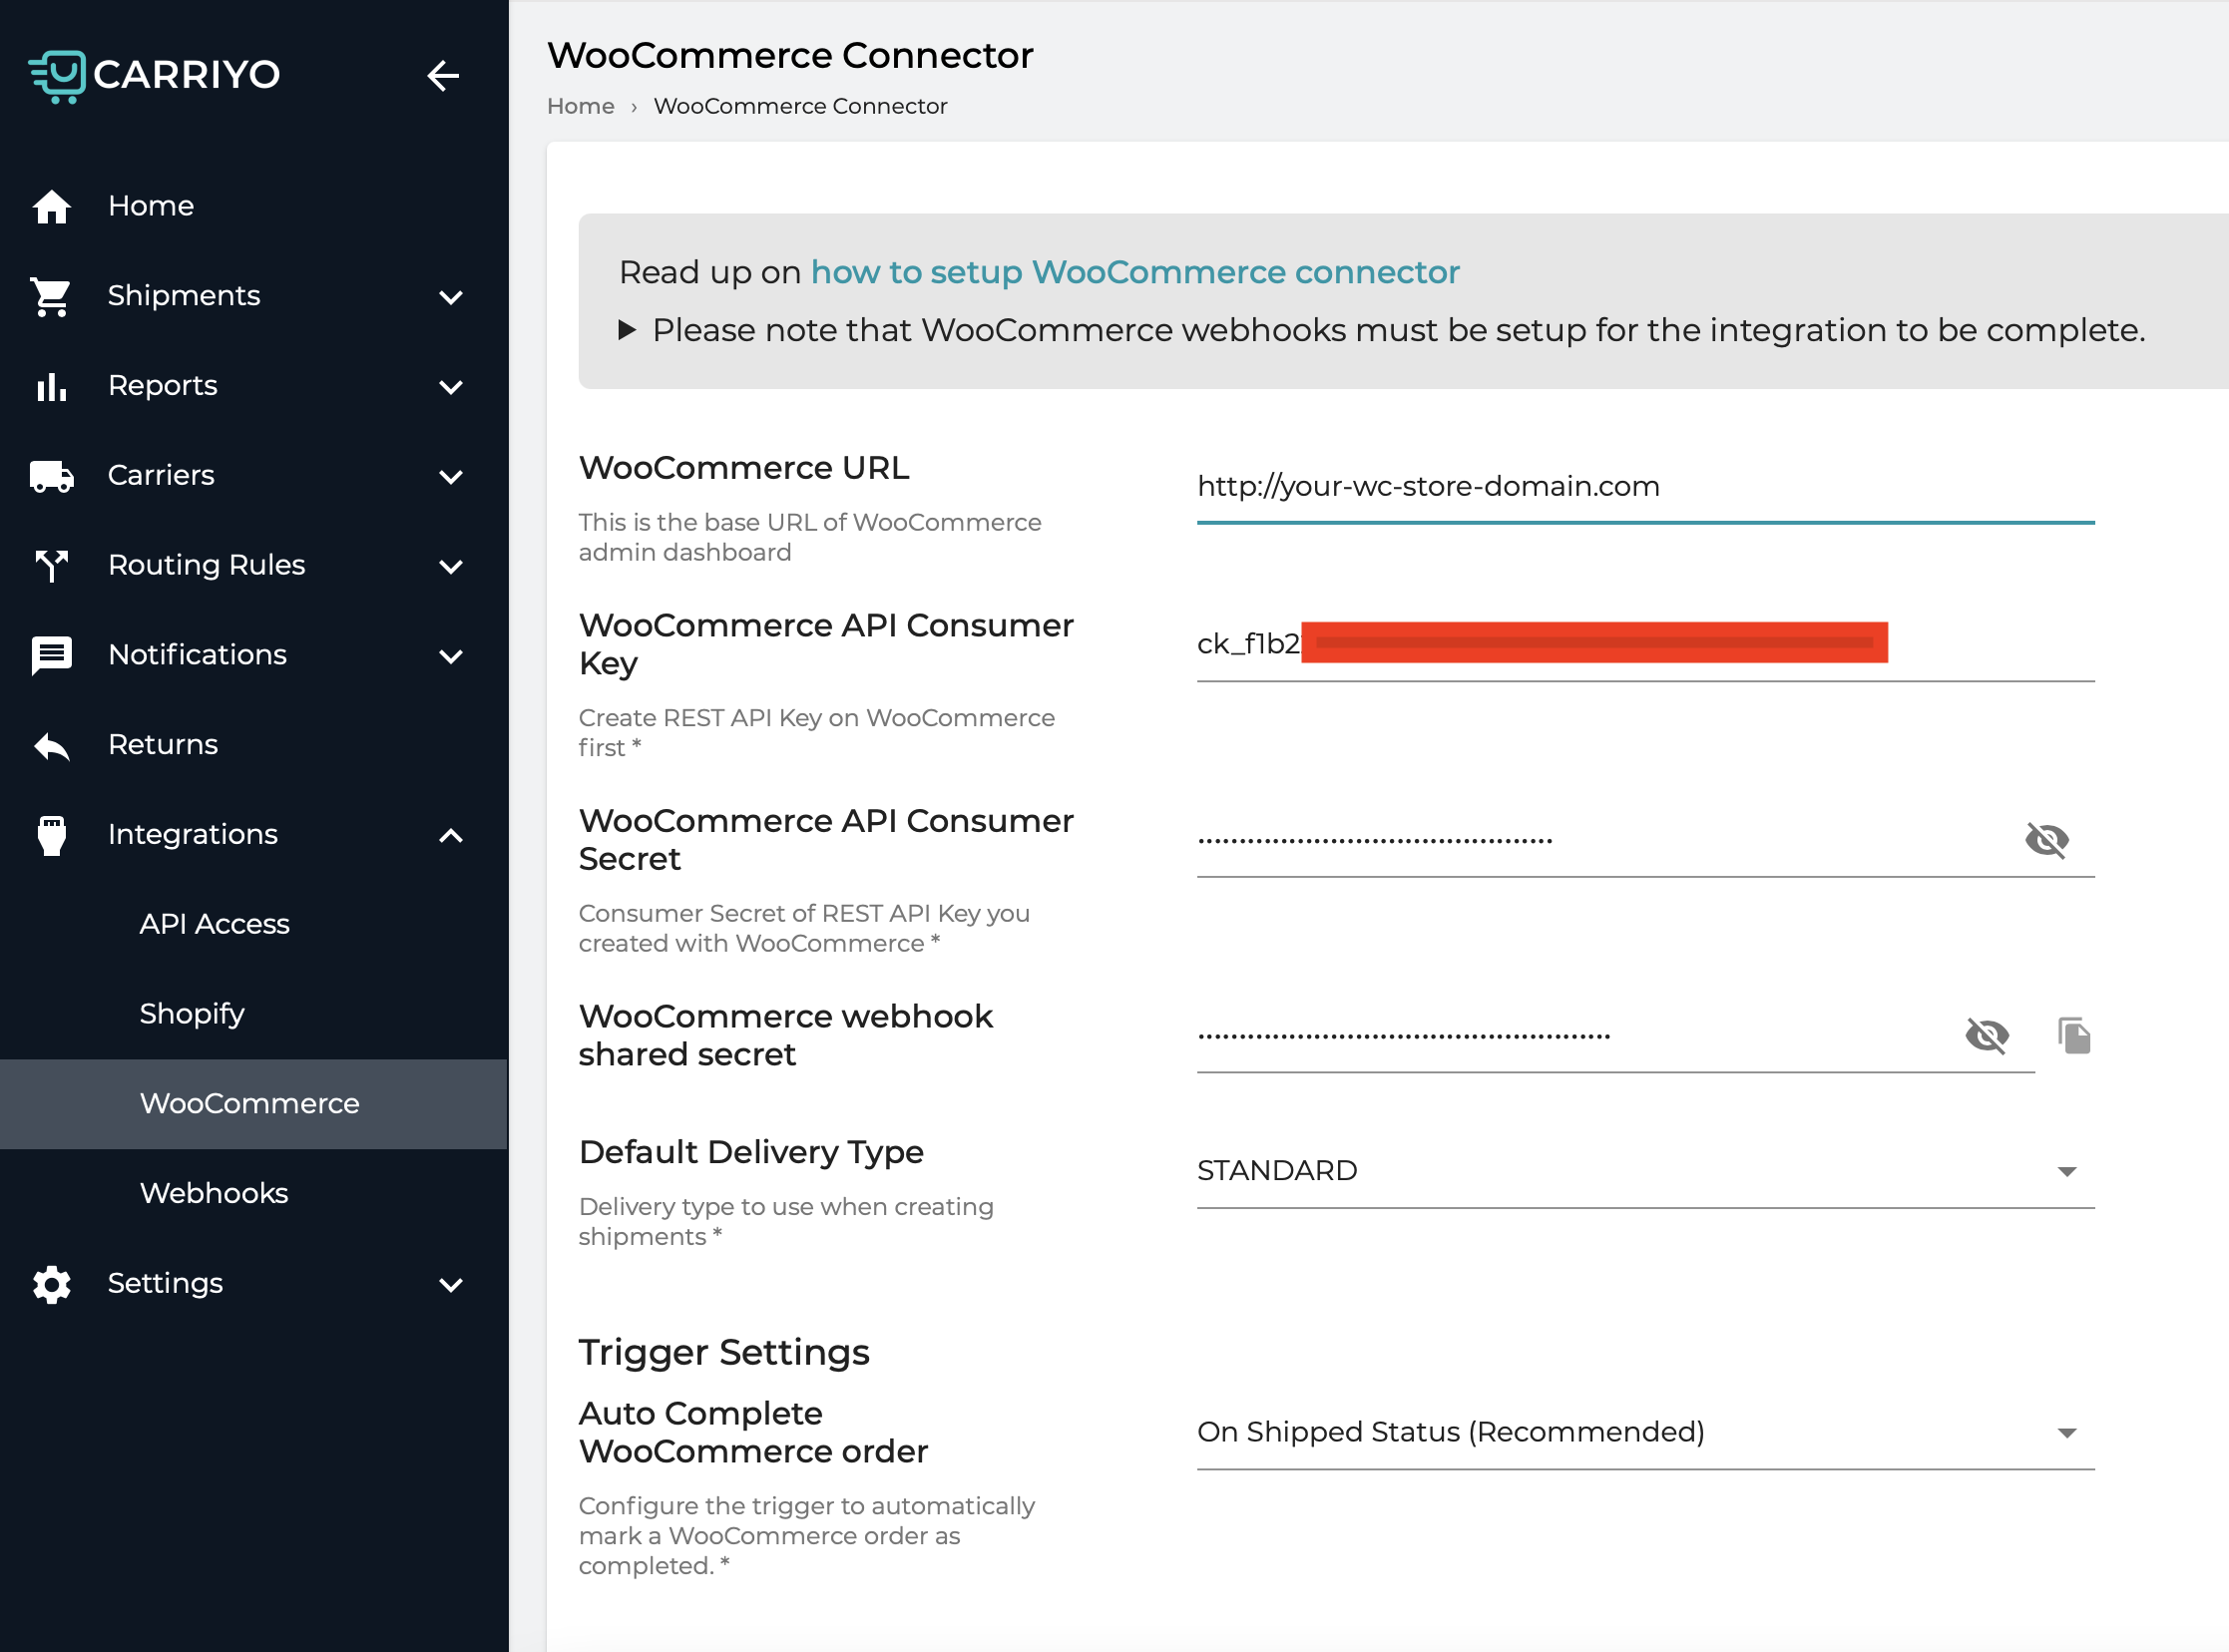
To start the setup, log in to Carriyo https://dashboard.carriyo.com and go to Integrations>WooCommerce Connector through the navigation menu. All of the fields marked with asterisk (*) need to be filled for the integration to be completed.
Setting up WooCommerce integration requires creating four webhooks and API Key in the WooCommerce administrative settings. The Carriyo WooCommerce Integration Setup page also includes some information that you will need to create the webhooks.
Please read the next sections to complete the setup.
Creating WooCommerce Webhooks
-
On the Carriyo WooCommerce Integration Setup page, copy webhook shared secret. Carriyo generates this value for you and it's required to create webhooks on WooCommerce platform.

- Navigate to WooCommerce Admin Dashboard at WooCommerce > Settings > Advanced > Webhooks.
- Press Add Webhook button.
-
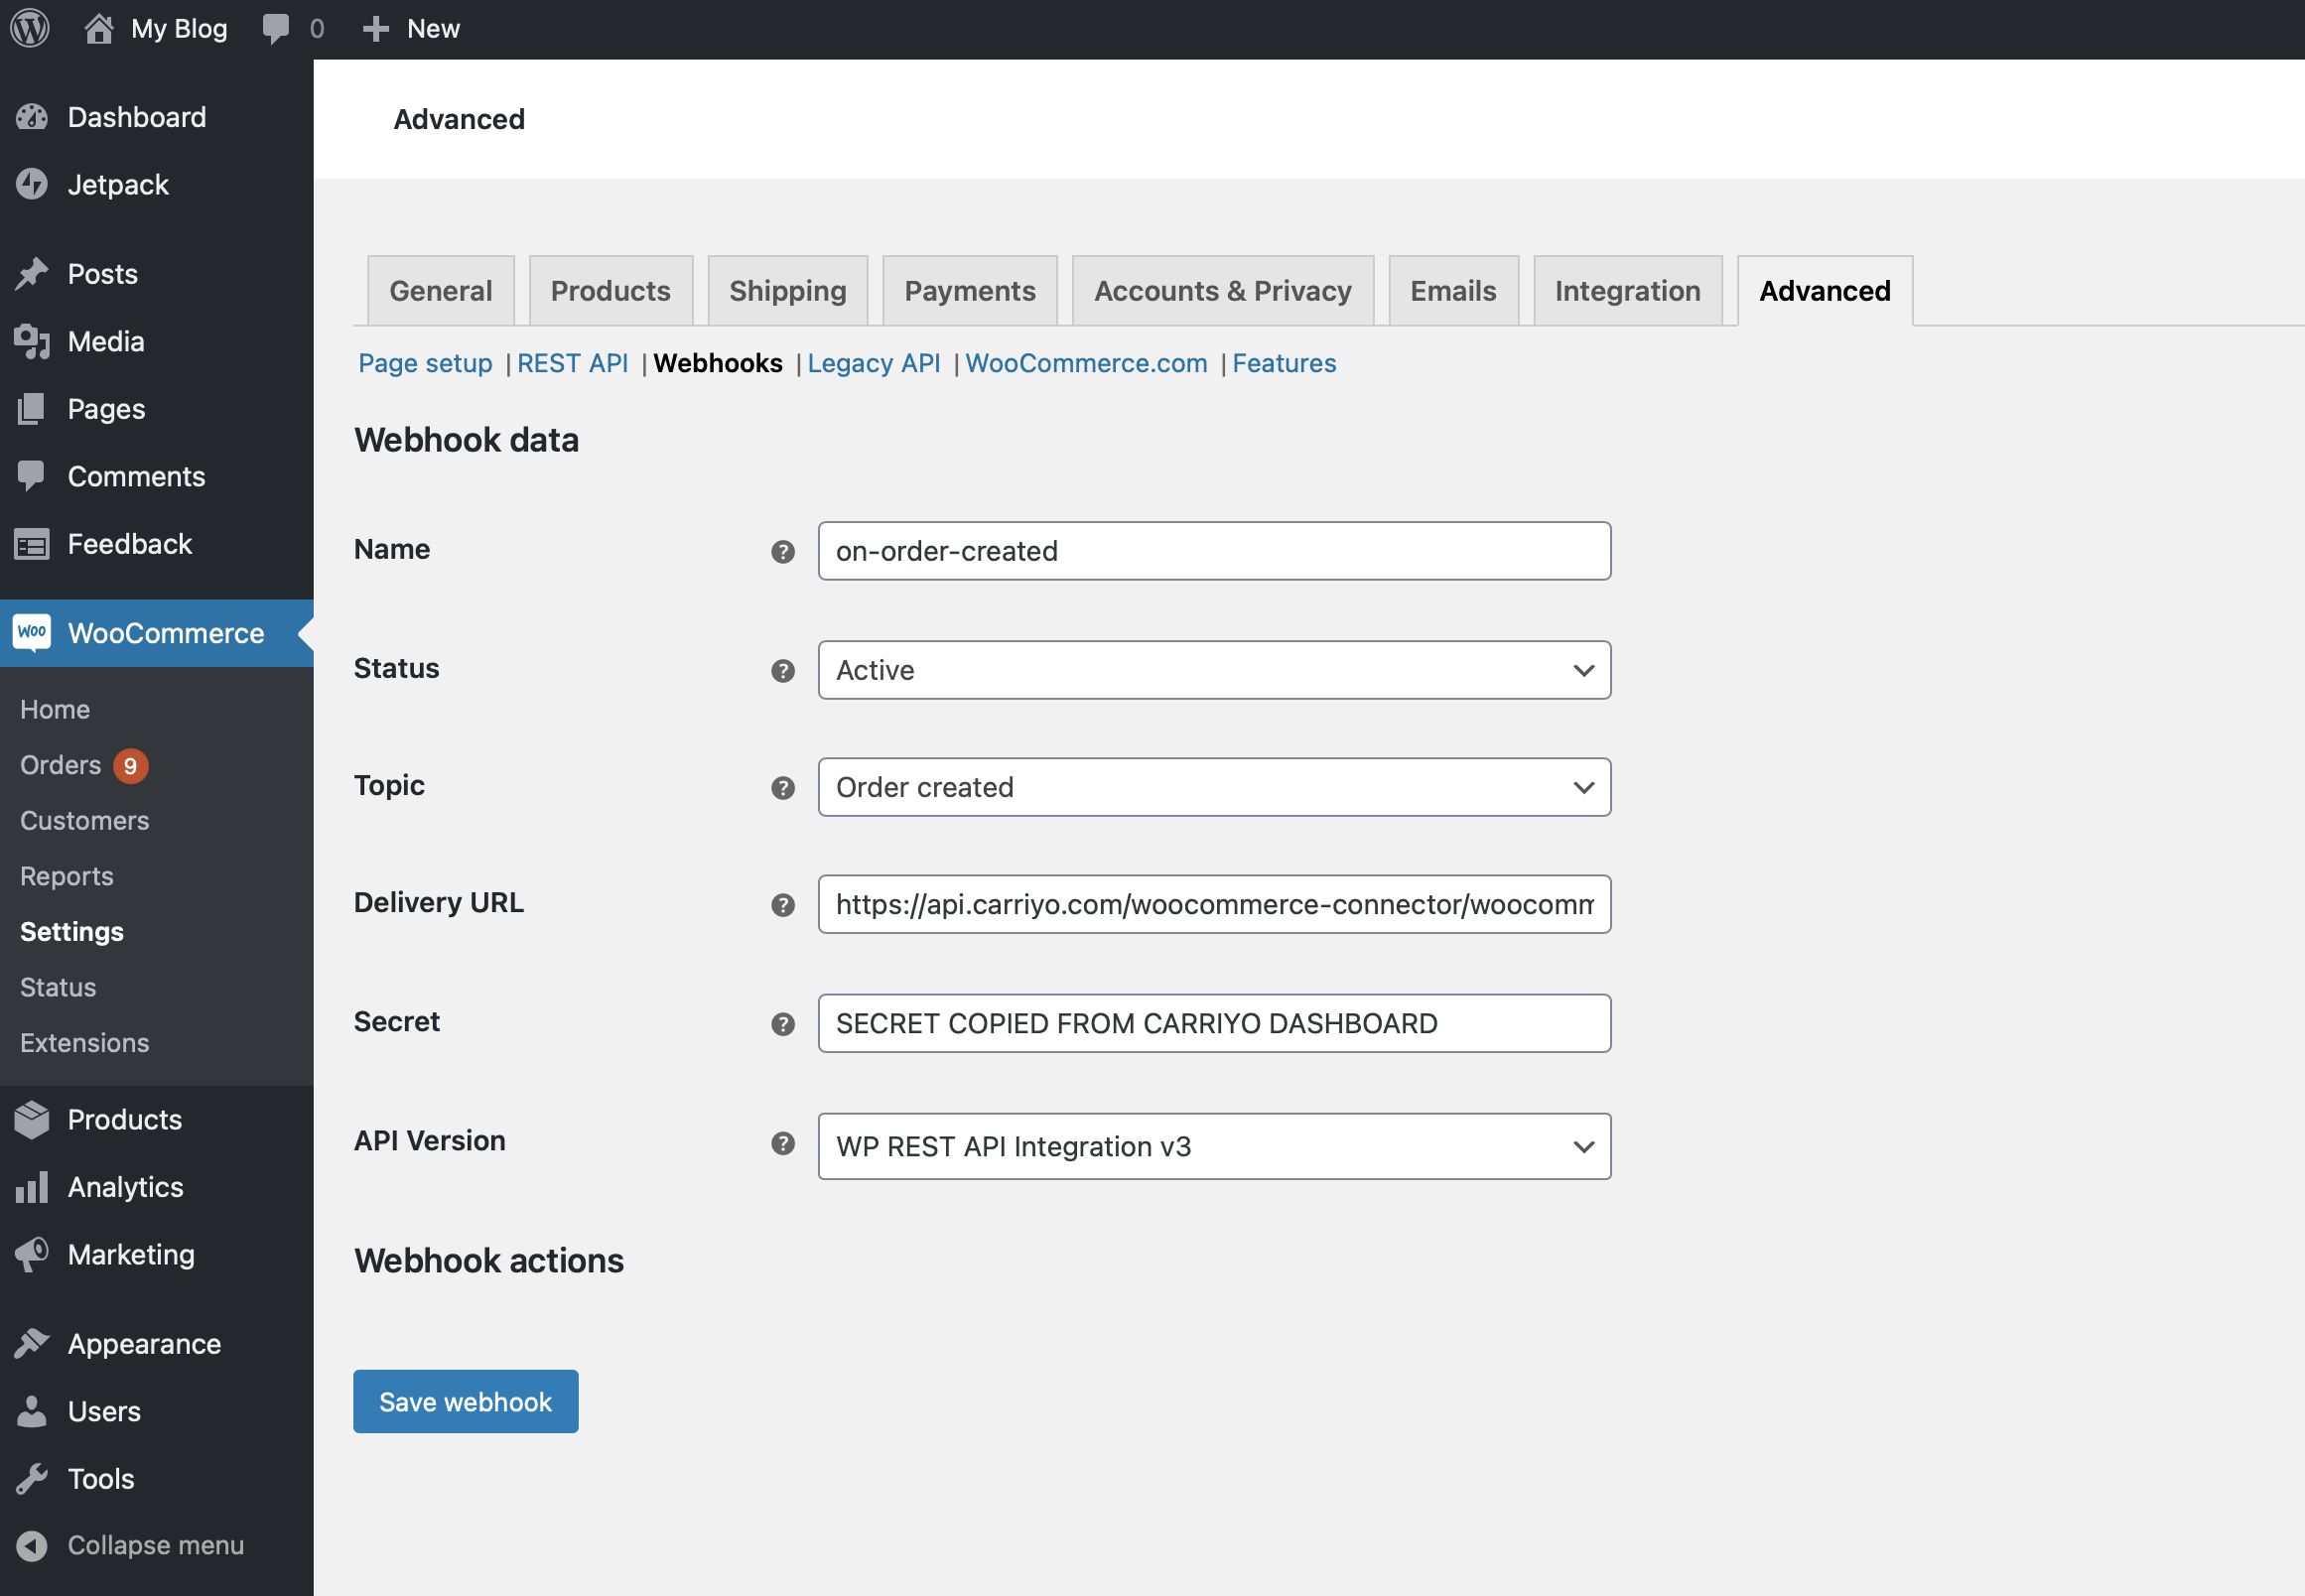
Let's create webhook triggered on order created event (Topic: Order created):

- Save the webhook and repeat these actions for Order updated, Order deleted and Order restored topics.
Note: please find concrete values for Delivery URL and Secret on Carriyo WooCommerce Integration Setup page.
Creating WooCommerce API Key
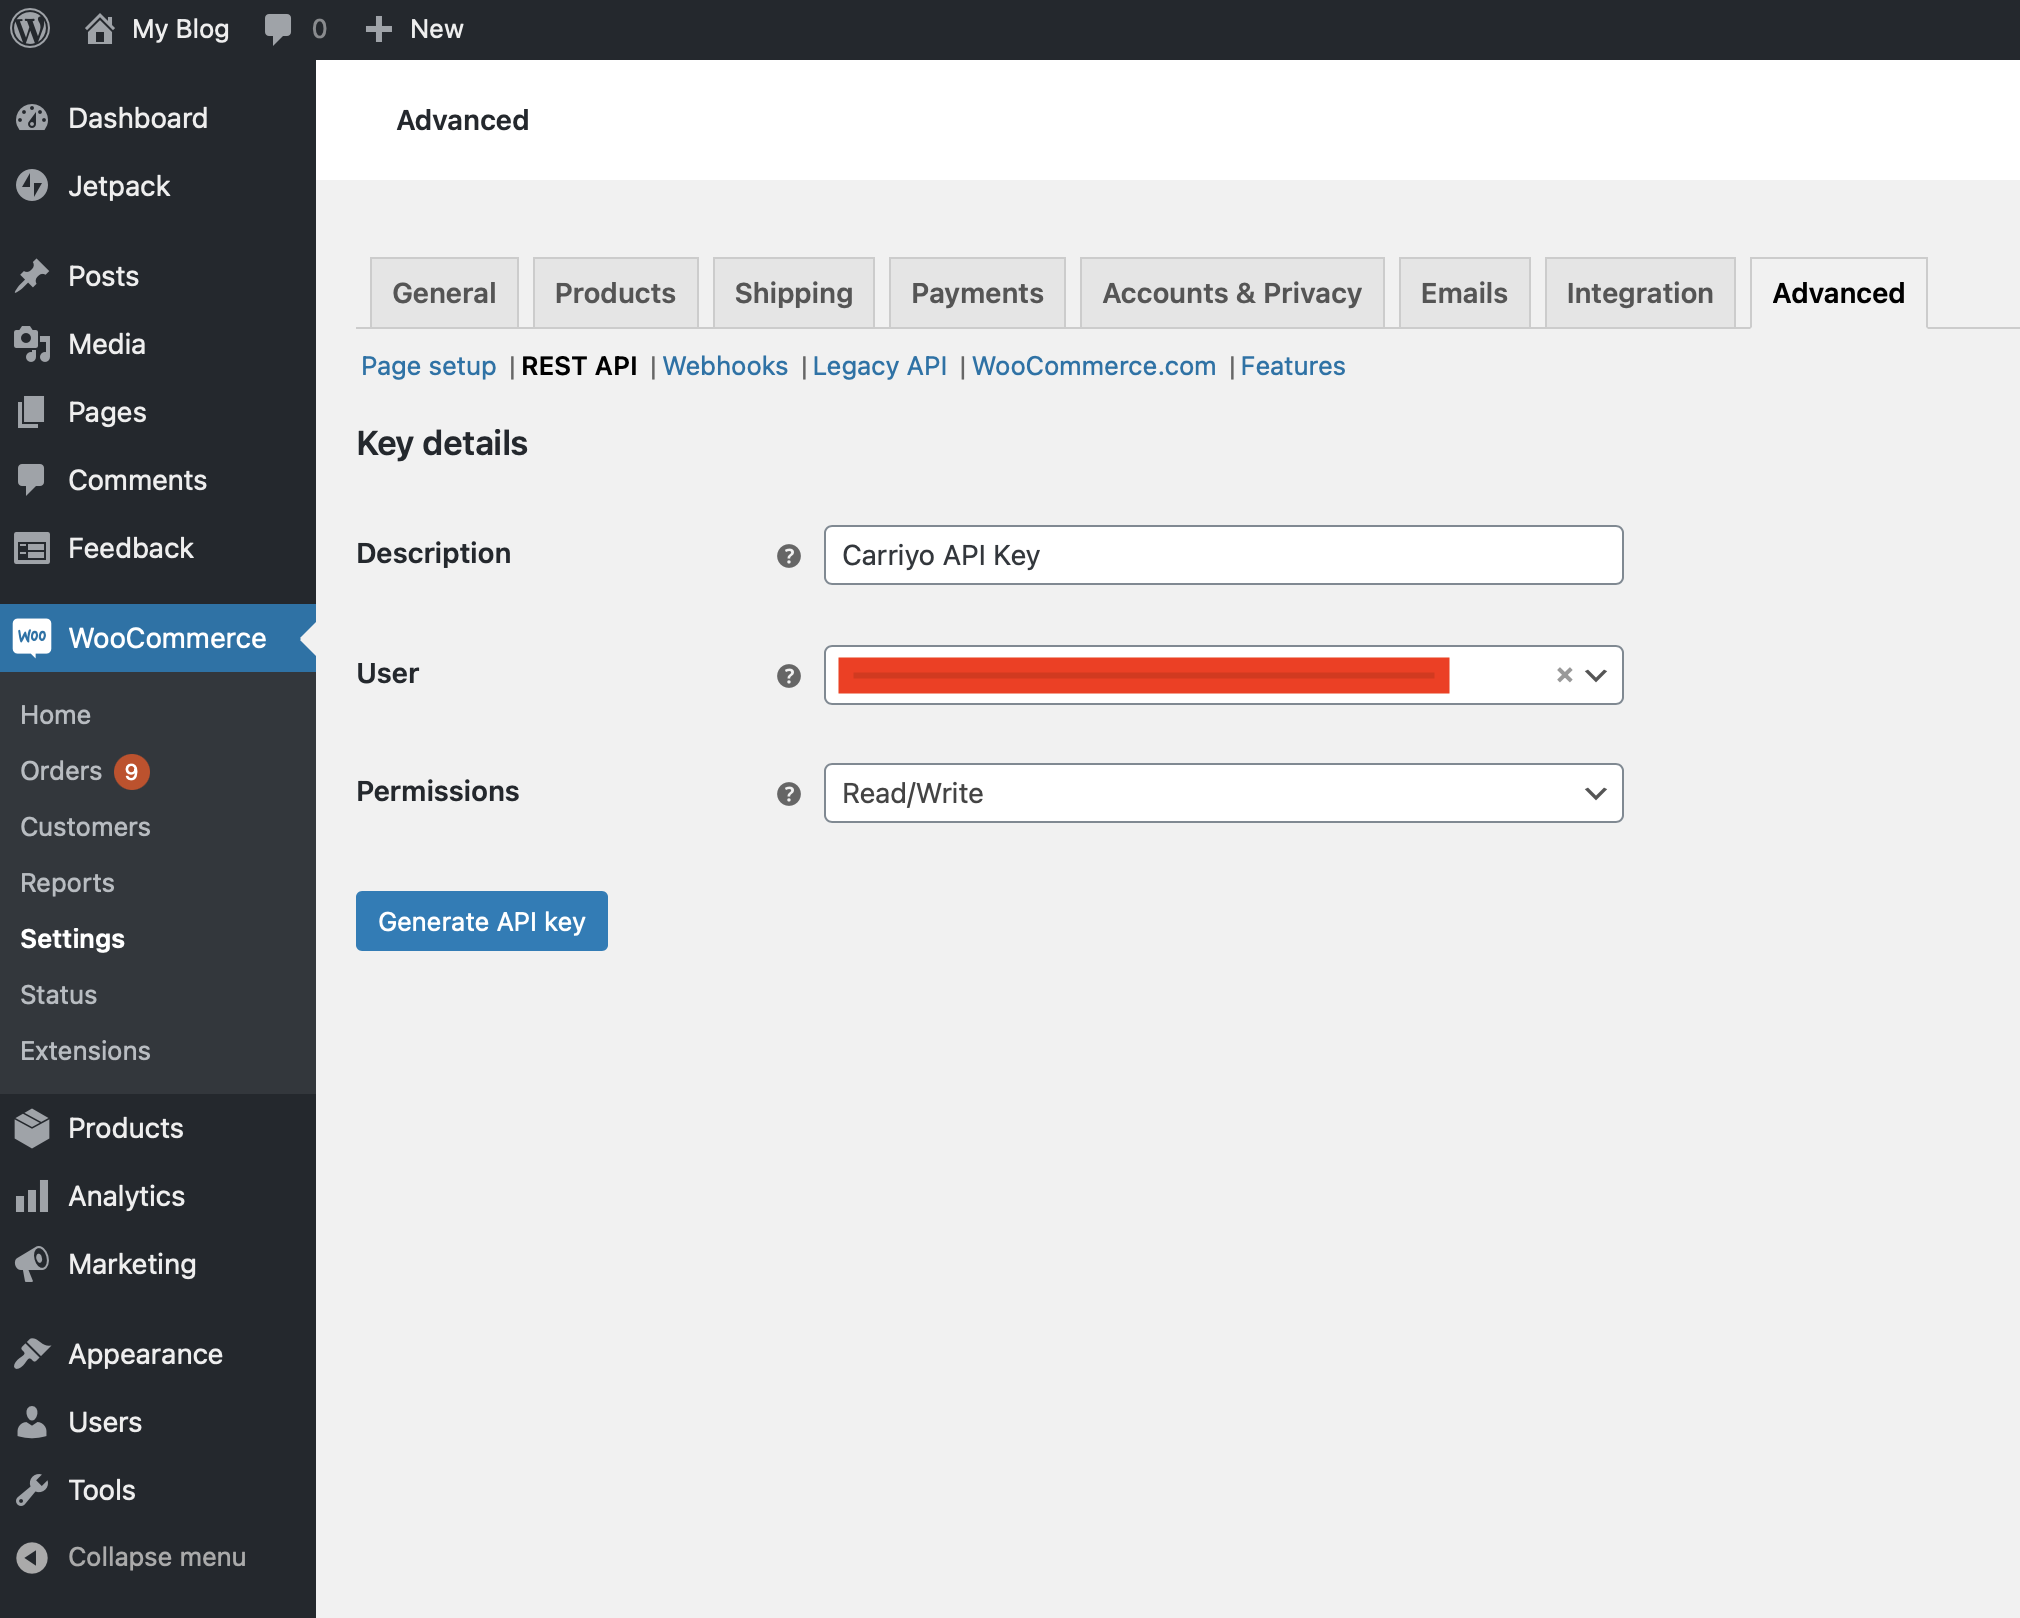
In order for Carriyo to be able to update orders in WooCommerce Platform, you'll need to create API Key with required permissions. To do this, please:
- Navigate to WooCommerce Admin Dashboard at WooCommerce > Settings > Advanced > REST API.
-
Specify Read/Write permissions as shown on the following screen

-
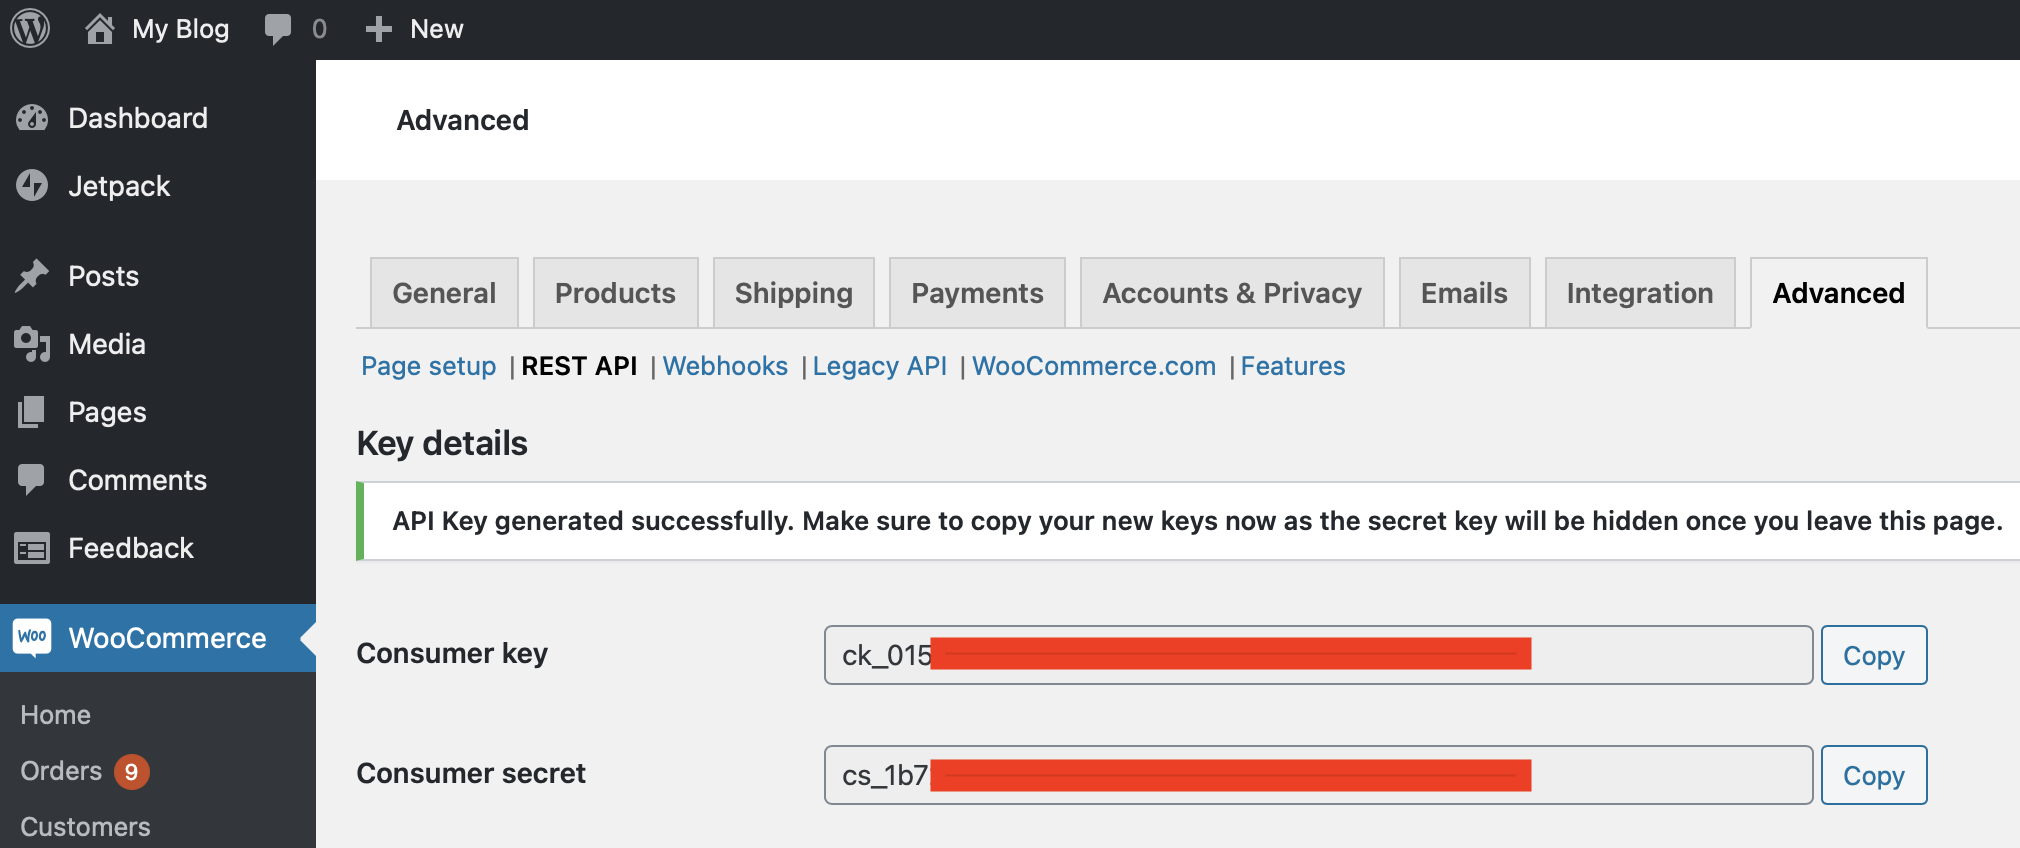
Click Generate API Key. On the next screen you'll see the created Consumer Key and Consumer secret that you can copy and paste in Carriyo WooCommerce Integration Setup page in WooCommerce API Consumer Key and WooCommerce API Consumer Secret fields respectively.
 Congratulations! You've completed your WooCommerce Setup!
Other Setup page settings
In this section we describe the setup of other settings in the Carriyo Dashboard:
WooCommerce Base URL, is not your website base URL name, rather it is the base URL of the admin panel.
Default Delivery Type - This option specifies the default value for all shipments that will be created by WooCommerce webhooks. If you don't see any selectable option here, you need to first create a delivery type by navigating to Settings > Custom Attributes in Carriyo Dashboard.
Auto Complete WooCommerce order - This option allows you to specify whether the WooCommerce order must be auto-completed when reaching some status (booked, shipped). Leave it blank to disable auto-completion.
Current Integration Limitations
When Carriyo Shipment is created by WooCommerce webhook, its status is draft, which means you'll need to manually confirm it. We do not enable auto-confirmation on Carriyo side, because some missing properties should be specified (for instance, pickup location).